Remote Access to Your Instance
You can access to created instance with different username informations according to selected image. When you connect to Instance you should enter username information that is belong to image to the <username> part.
These are:
CentOS Linux release 6.6 (Final) → username: cloud-user
CentOS Linux release 7.0.1406 (Core) → username: centos
Debian Wheezy 7.8 → username: debian
Fedora 21 → username:
SUSE Linux Enterprise Server 11 SP3 → username: root
Turnkey Magento 13.0 → username: root
Ubuntu Trusty → username: ubuntu
Linux CoreOS 1855.40 → username: core
In case of Instances opened with Windows image, you should access Instance after Instance starts via console at the panel and you should generate a password from the Windows Login screen.
Afterwards you can connect the public IP assigned instance via RDP (Remote Desktop Protocol).
Windows Server 2008 R2 Standard SP1
Windows Server 2012 R2 Standard (2)
Connection via Created Key
Command line mentioned below should be written to consol screen in order to connect Instance according to method used in Creating Key Pair.
ssh -i <path/to/file.pem> <username>@<instance_public_ip>
Connection via Added Key
Command line mentioned below should be written to consol screen in order to connect Instance according to method used in Adding Key Pair.
ssh -i cloud.key <username>@<instance_public_ip>
Instance Connection via Windows
3rd party applications should be used in order to connect and manage Linux Instance via Windows. PuTTY is one of the applications. Steps that explain how to connect Linux instance created via PuTTY are mentioned below.
PuTTY
First of all, PuTTY application should be downloaded to Windows. You can download application from the link:{+}http://www.chiark.greenend.org.uk/~sgtatham/putty/download.html+
Click to download PuTTY
Creating Key Pair
Open the page via Key Pairs menu located under the Compute heading at left of the panel. If there is any key created before it is listed here. In order to create new Key, click the Create Key Pair button.
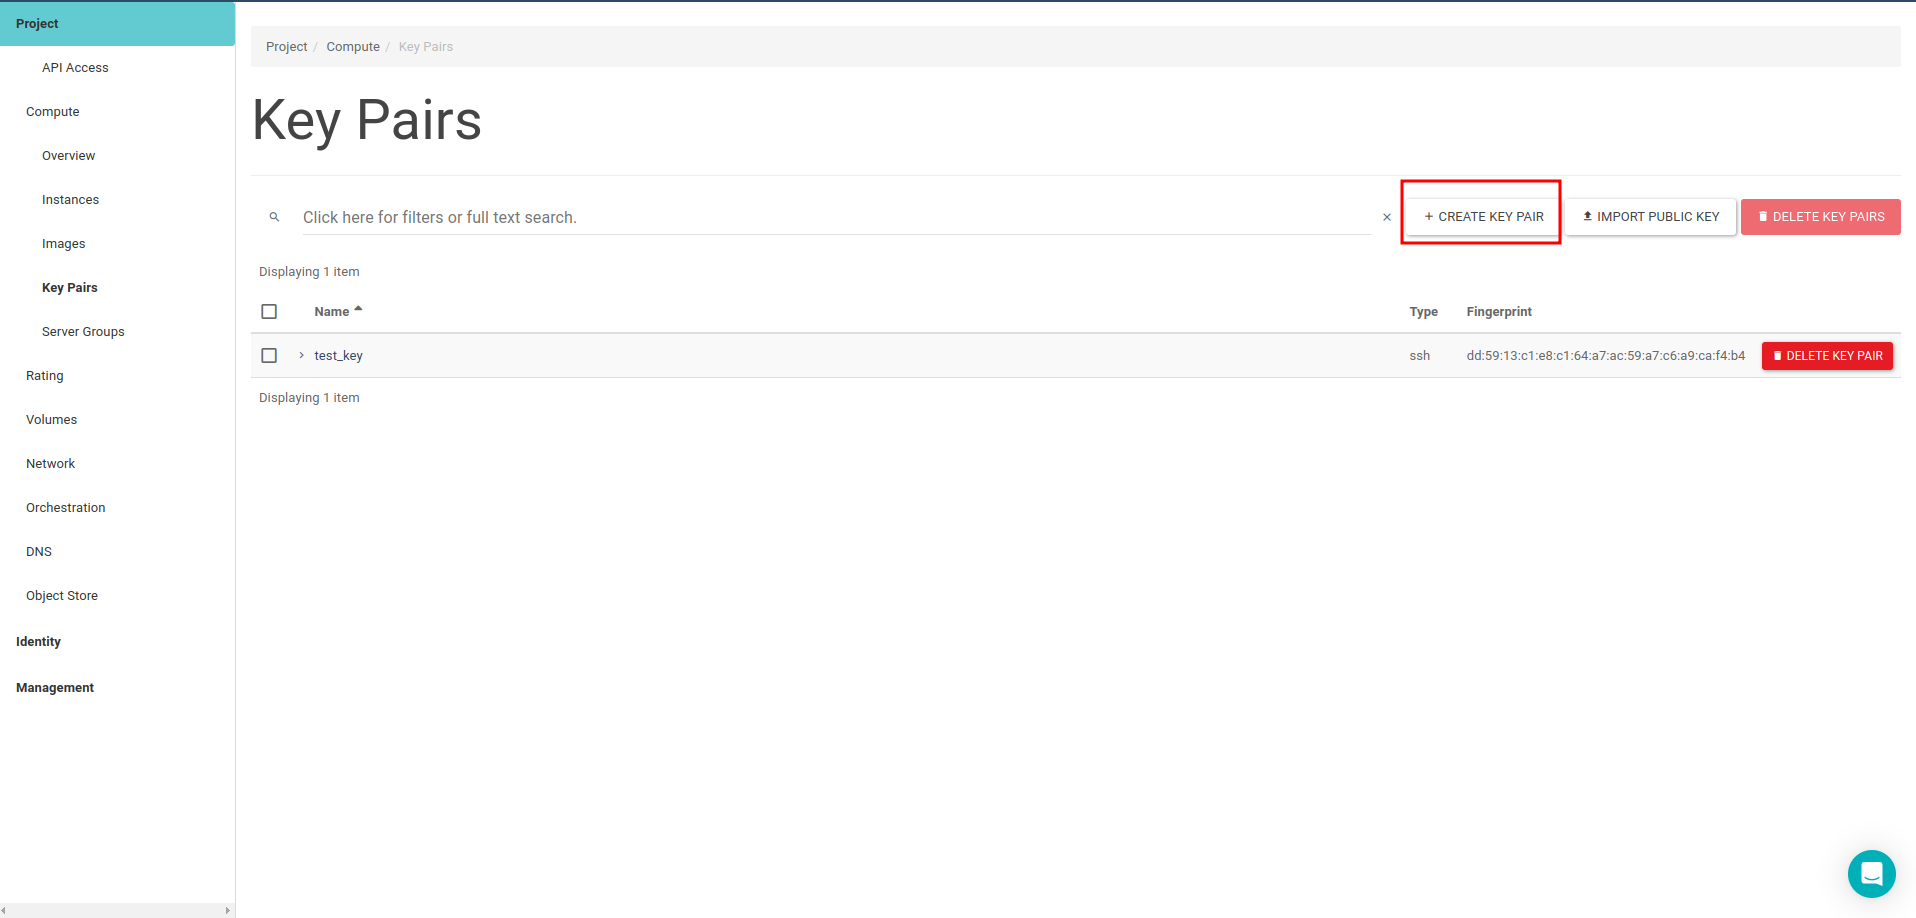
An appropriate name is given to the key that will be used for access to instances at the opened pop-up. Click the Create Key Pair button.

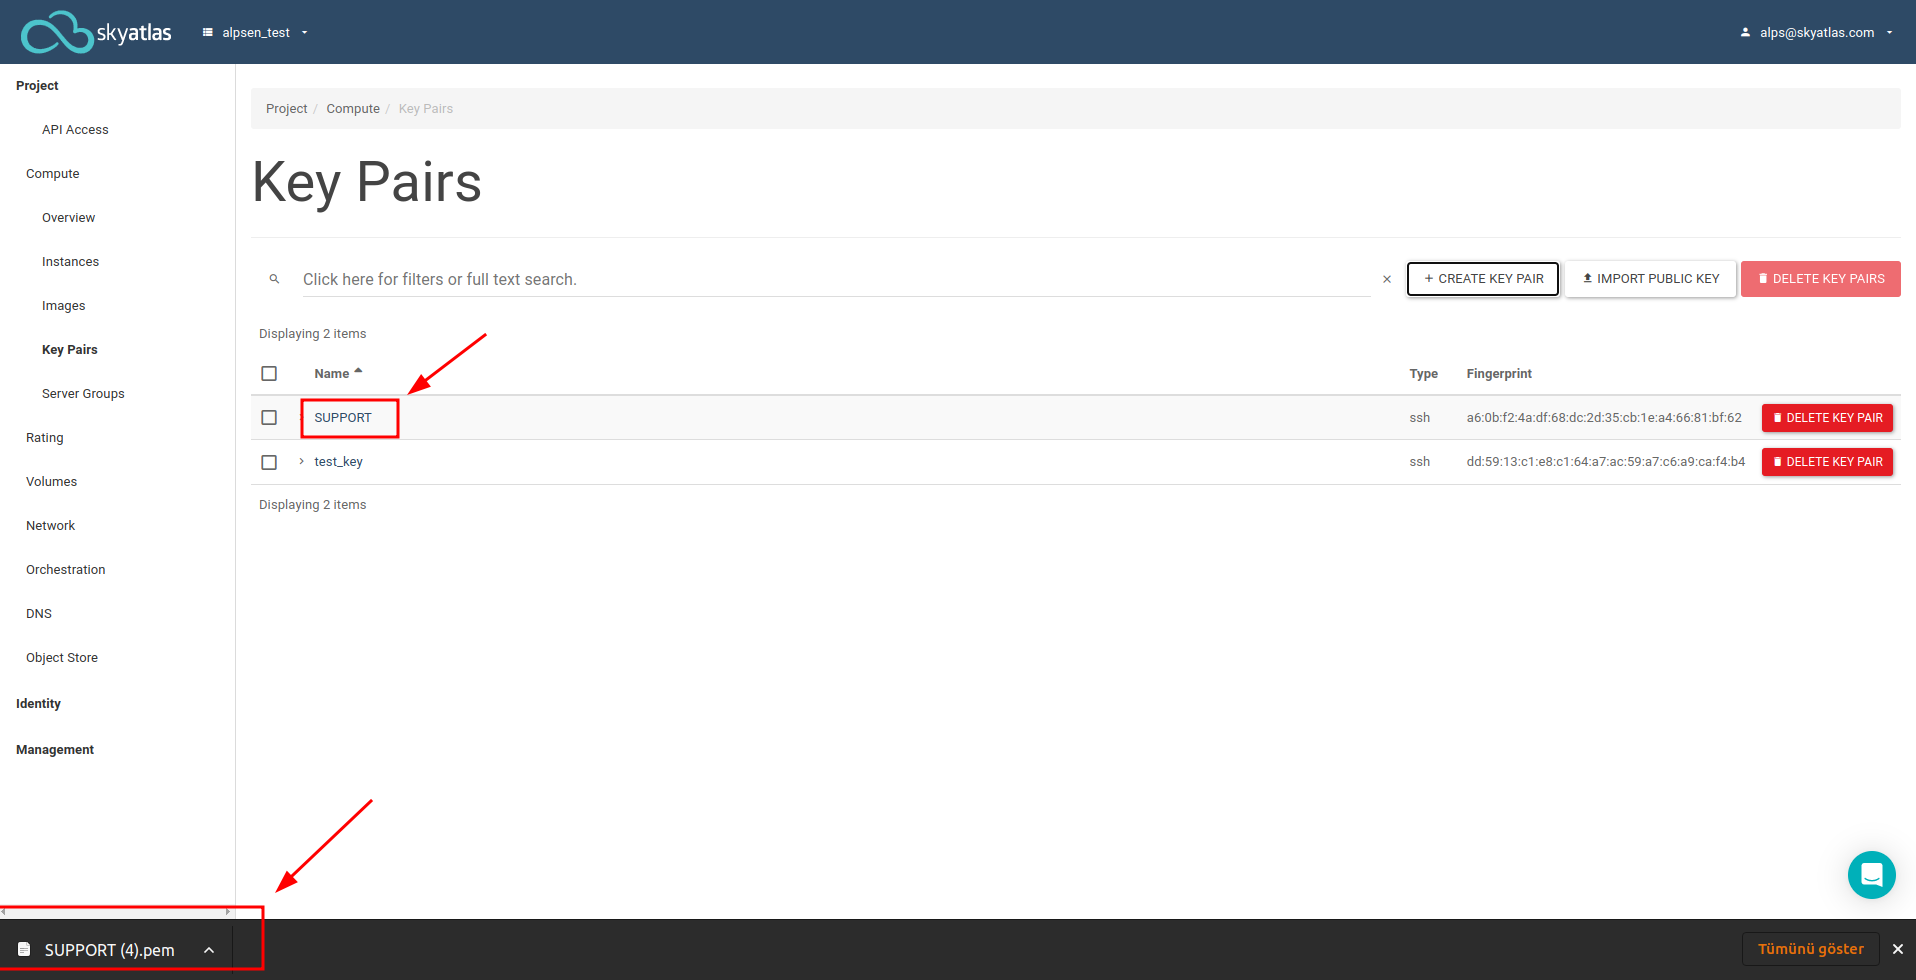
After that,dowload the file that has .pem extension and has a name given for the key. Then downloaded file will be used to connect to instance via SSH.

Created Key is listed at the Key Pairs tab in the Key Pairs page
PuTTYgen
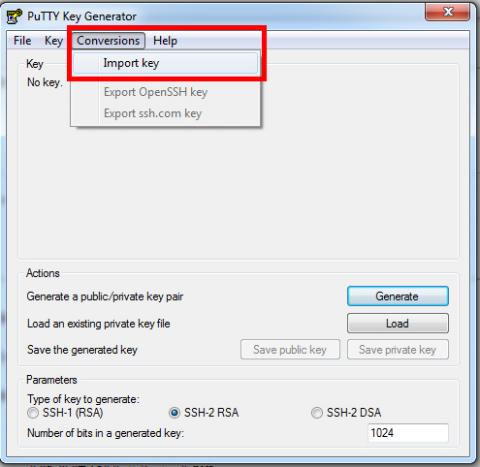
In order to add .pem extension file which is generated and downloaded via PuTTYgen panel to the PuTTY, it should be converted to .ppk extension file via PuTTYgen.
Click to download PuTTYgen.
.pem extension file downloaded from panel is imported to PuTTYgen as shown in screenshot.
Afterwards a password that will be used to connect to Instance is entered to the Key passphrase and Confirm passphrase area as shown in screenshot.
After password is entered click the Save private key button and save the .ppk extension file by giving name to it.

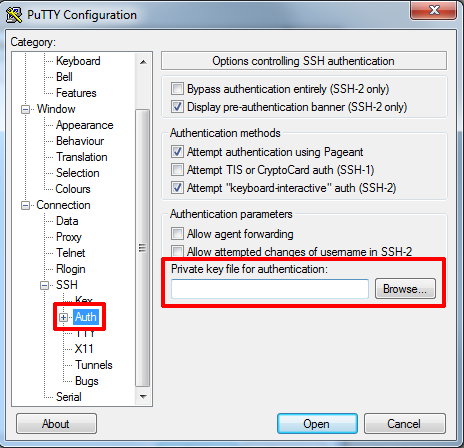
.ppk extension file is added by starting dowloaded application PuTTY as shown in screenshot. After this step you can connect to Instance which has public IP defined via Windows.
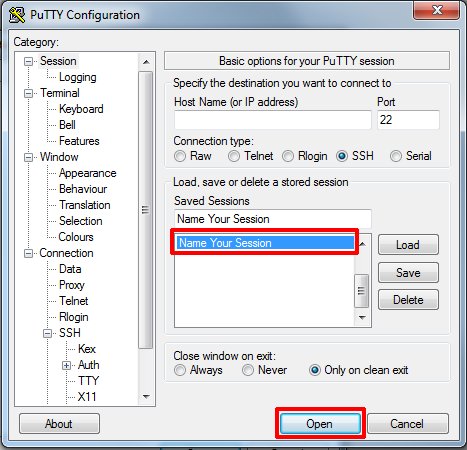
In order to connect to Instance, public IP of the Instance is written to Host Name (or IP address) area as shown in screenshot and this registration is saved to be used in the future.

Open a console screen by clicking Open after selecting this registered session. Username information is entered according to image that Instance has via this console (See:Instance ion (SSH)) and after that register with passphrase that is given via PuTTYgen. After connection success, Instance is ready to use and access.