
How to Run MaestroPanel on the Server?
You can optimize your server perfonmance and do complex tasks easily a simple and intuitive interface on MaestroPanel.
With the MestroPanel template, which you can access publicly through the system using Skyatlas' IaaS service, you can easily deploy a fully configured system with MaestroPanel installed.
Firstly, log in via
and access server administration panel.
After that, following the section
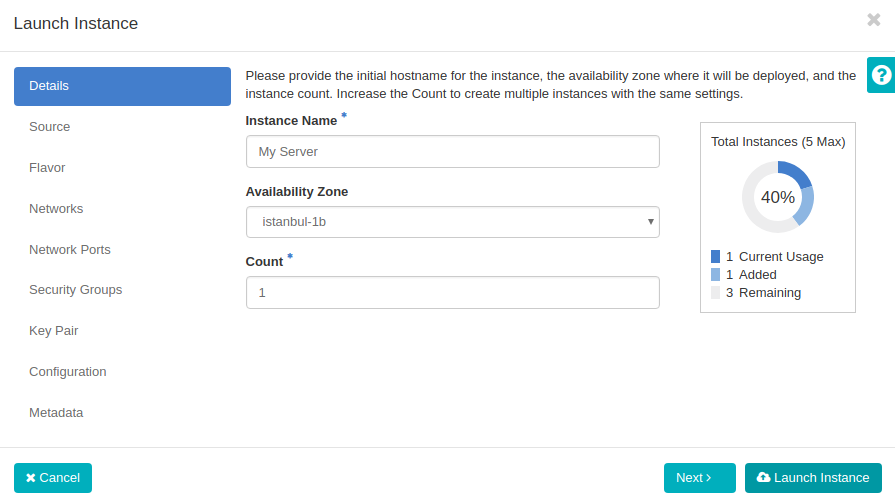
Project > Instances > Launch Instancefor access to new instance form.
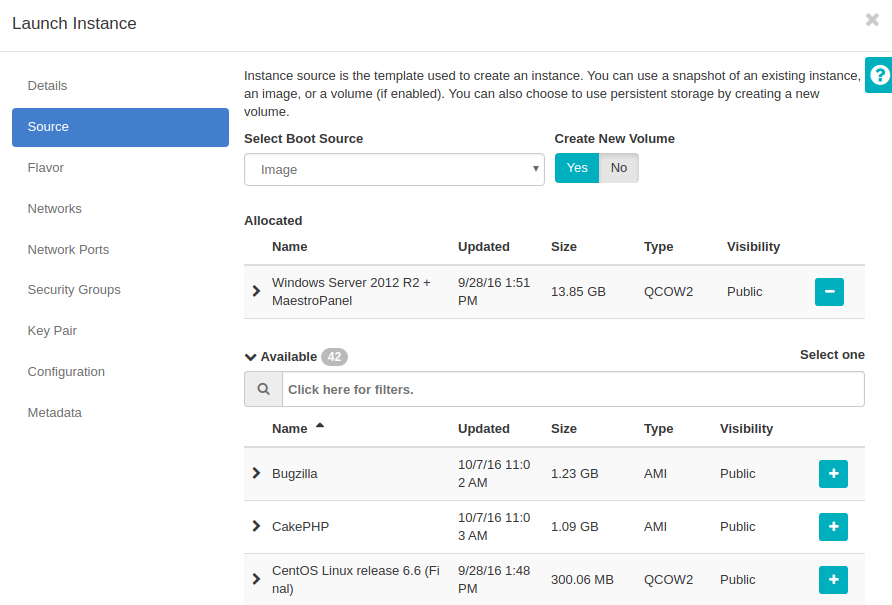
On the "Launch Instance Form" , enter the "Instance Name". After that, in a "Source Section" , select "Image" from "Select Boot Source" area, and select the
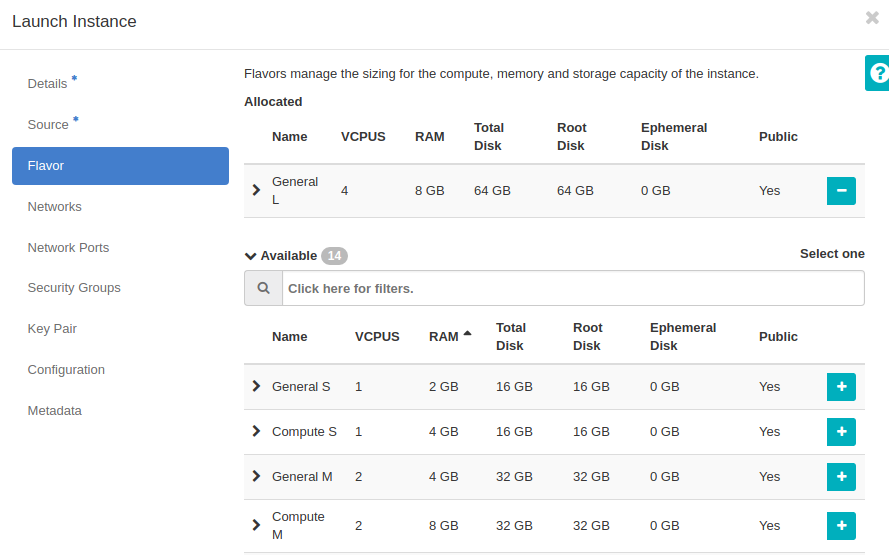
Windows Server 2012 R2 + MaestroPanelfrom image list. Then, select the "Flavor" type and click the "Launch Instance" button.
After this phase, the system will give you an optimized configured MaestroPanel on Windows Server 2012.
Access to Console
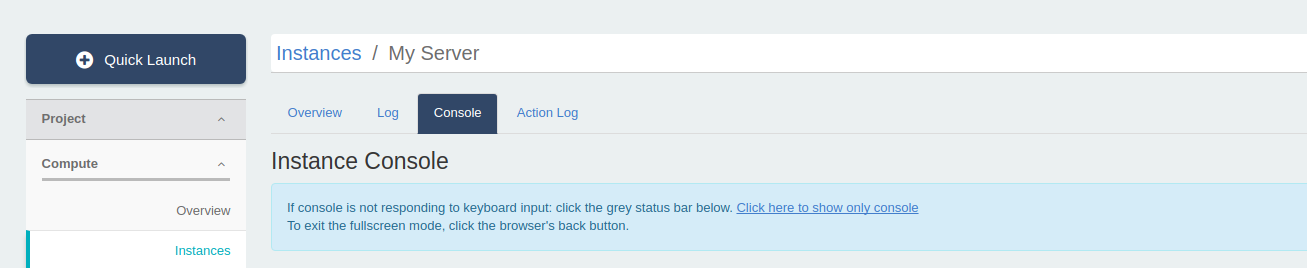
After Cloud Server is activated, you must define the Administrator password via Console (Terminal) and activate the server.For this via Skyatlas, following the sections
Project > Instances > Server Nane > Console(Terminal)
Establish a console connection to define the password for the Administrator and contact the server desktop.
Console Access Screen
Access to MaestroPanel
After running the server via Skyatlas and defining the Administrator password, you can now access the MaestroPanel and get the wizard to run it.
From within the server for this; Use
http://localhost:9715In the opening MaestroPanel home screen, type the default user name and password.
Attention! The following password must be used by default to log in to the MaestroPanel.
User Name : admin
Password : setup!
Attention! After you log in, you must change the default username and password.
After this step, you can complete the MaestroPanel wizard's steps.
Note: Skyatlas doesn't provide MaestroPanel license. You can obtain the MaestroPanel license free of charge through the http://secure.maestropanel.com .