
How to Create Stack on SktAtlas Panel
Stack allows you deploying multipli instance at the same time.
In this article, we will create a simple stack.
Firstly, you need to create a template file with .yaml extension and add the following lines into it.
# vim stack.yaml

heat_template_version: 2016-04-08

description: Simple template to deploy a single compute instance

parameters:
  key_name:
    type: string
    label: Key Name
#    default: cloudkey
    description: Name of key-pair to be used for compute instance

  image_id:
    type: string
    label: Image ID
#    default: Ubuntu 16.04 Xenial
    constraints:
          - allowed_values: [CentOS Linux release 6.6 (Final) ,
          CentOS Linux release 7.0.1406 (Core),
          Debian Jessie 8.2,
          Debian Wheezy 7.8 ,
          Ubuntu 16.04 Xenial ,
          Ubuntu Trusty ]
    description: Image to be used for compute instance

  instance_type:
    type: string
    label: Instance Type
    constraints:
          - allowed_values: [ General S	,
          Compute S	,
          General M	,
          Compute M	,
          General L	,
          Extreme S	,
          Compute L	,
          Extreme M	,
          General XL,
          Compute XL,
          Extreme L,
          General XXL,
          Extreme XL,
          Compute XXL,
          Extreme XXL	]
    description: Type of instance (flavor) to be used

resources:
  Test_Instance1:
    type: OS::Nova::Server
    properties:
      key_name: { get_param: key_name }
      image: { get_param: image_id }
      flavor: { get_param: instance_type}
  Test_Instance2:
    type: OS::Nova::Server
    properties:
      key_name: { get_param: key_name }
      image: { get_param: image_id }
      flavor: { get_param: instance_type}
You will follow these steps for create a stack:
Orchestration → Stack → Launch Stack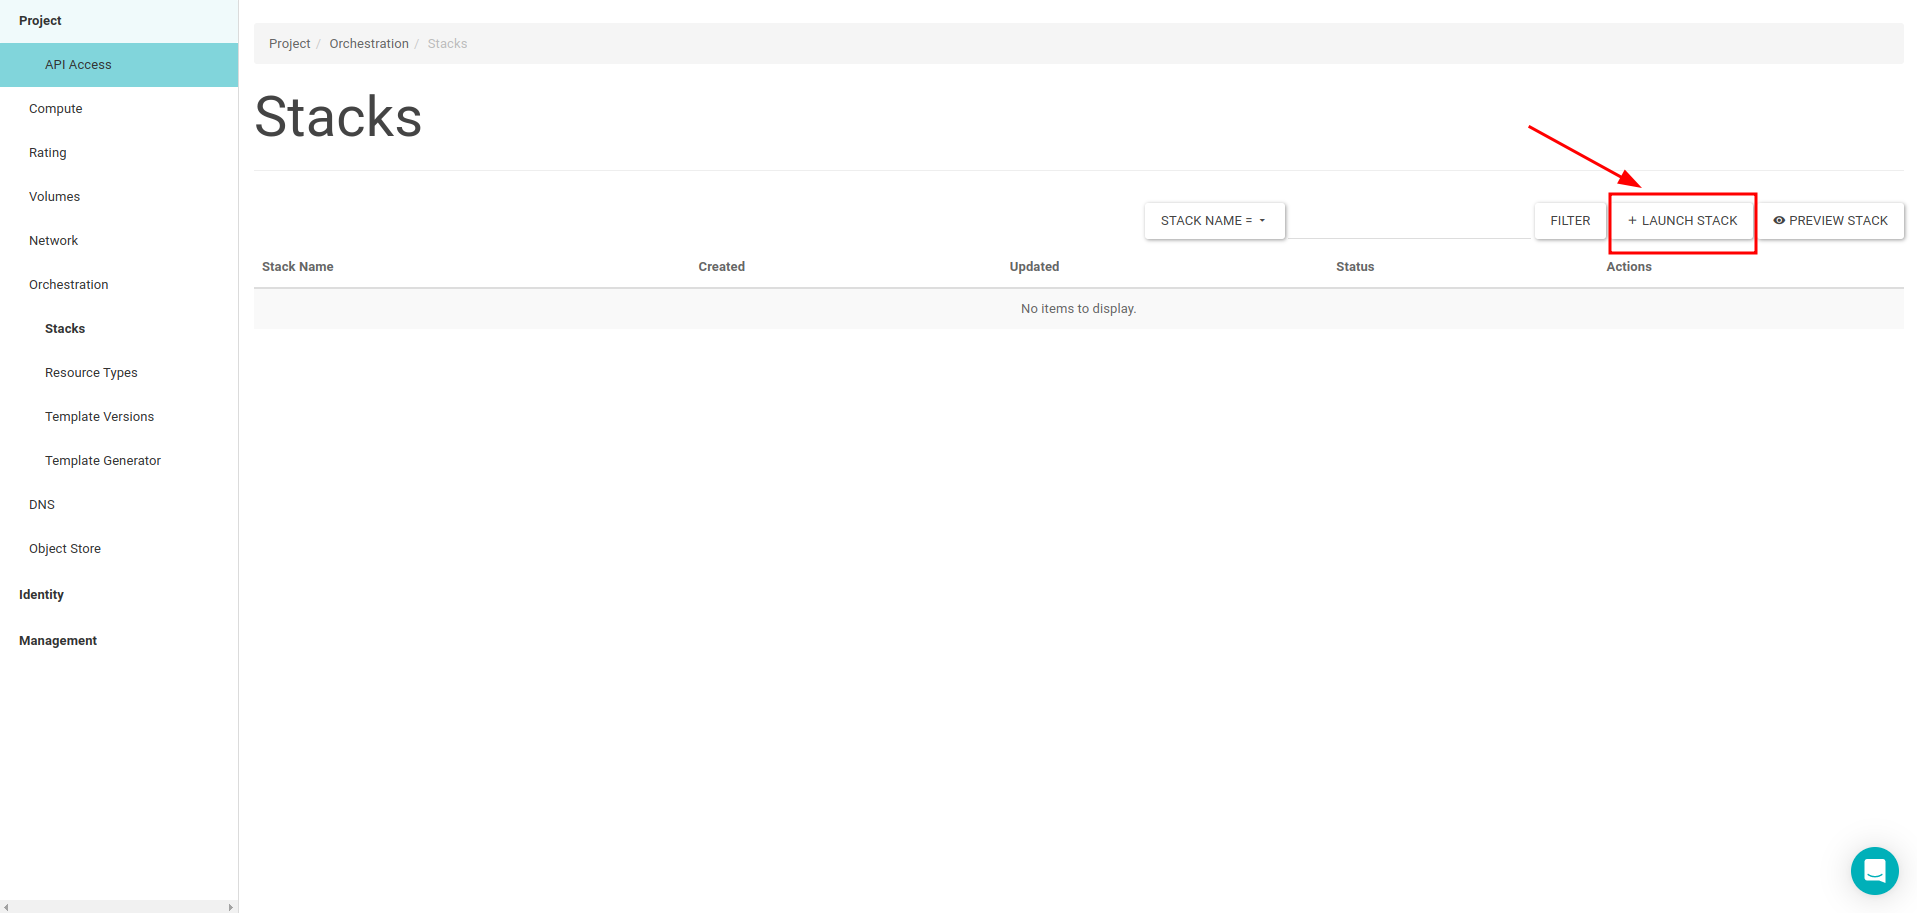
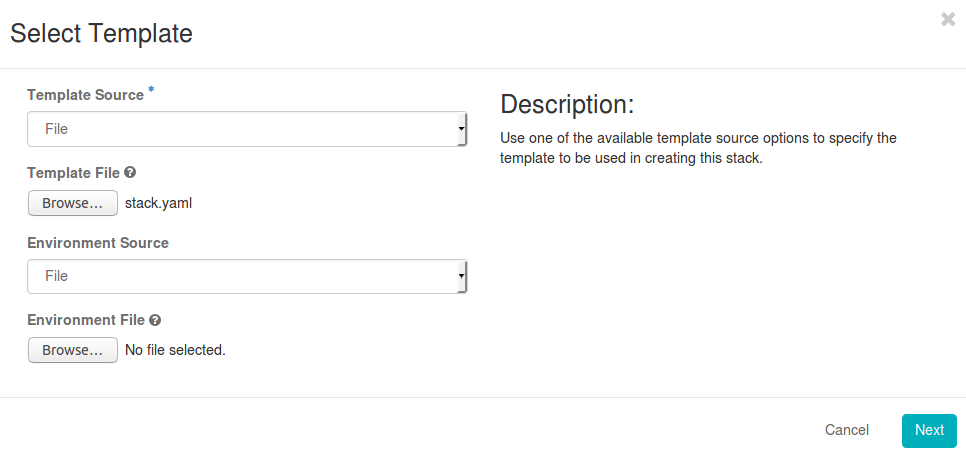
Choose the File option from the Template Source for uploading stack.yaml file and click the Next button.
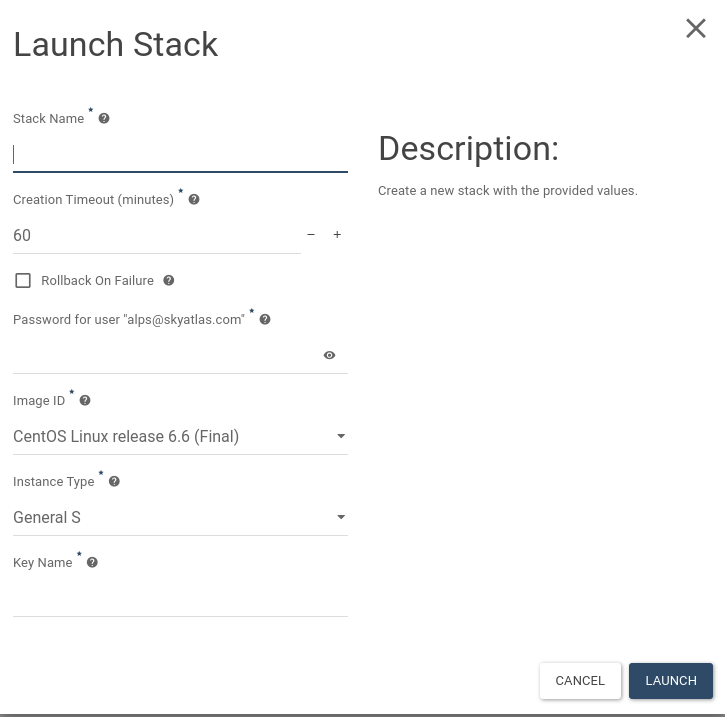
On the Launch Stack pop-up page :
Stack Name: please enter stack name
password for user : please enter your account name
Image ID: please choose image for your instances
Instance Type : please choose flavor type for your instances
Key Name : please enter your private key
after these operations, click the Launch button.
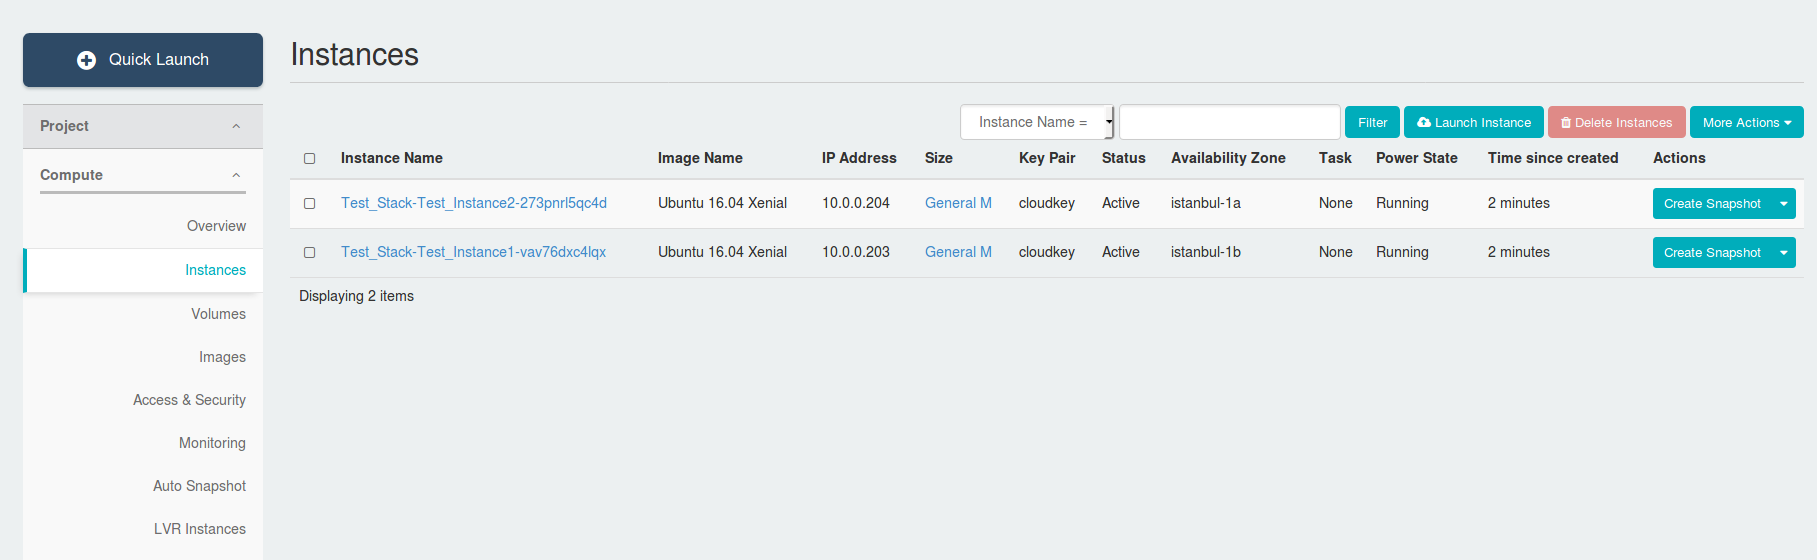
After creating stack, you will see your Test_Stack on the Stacks section.
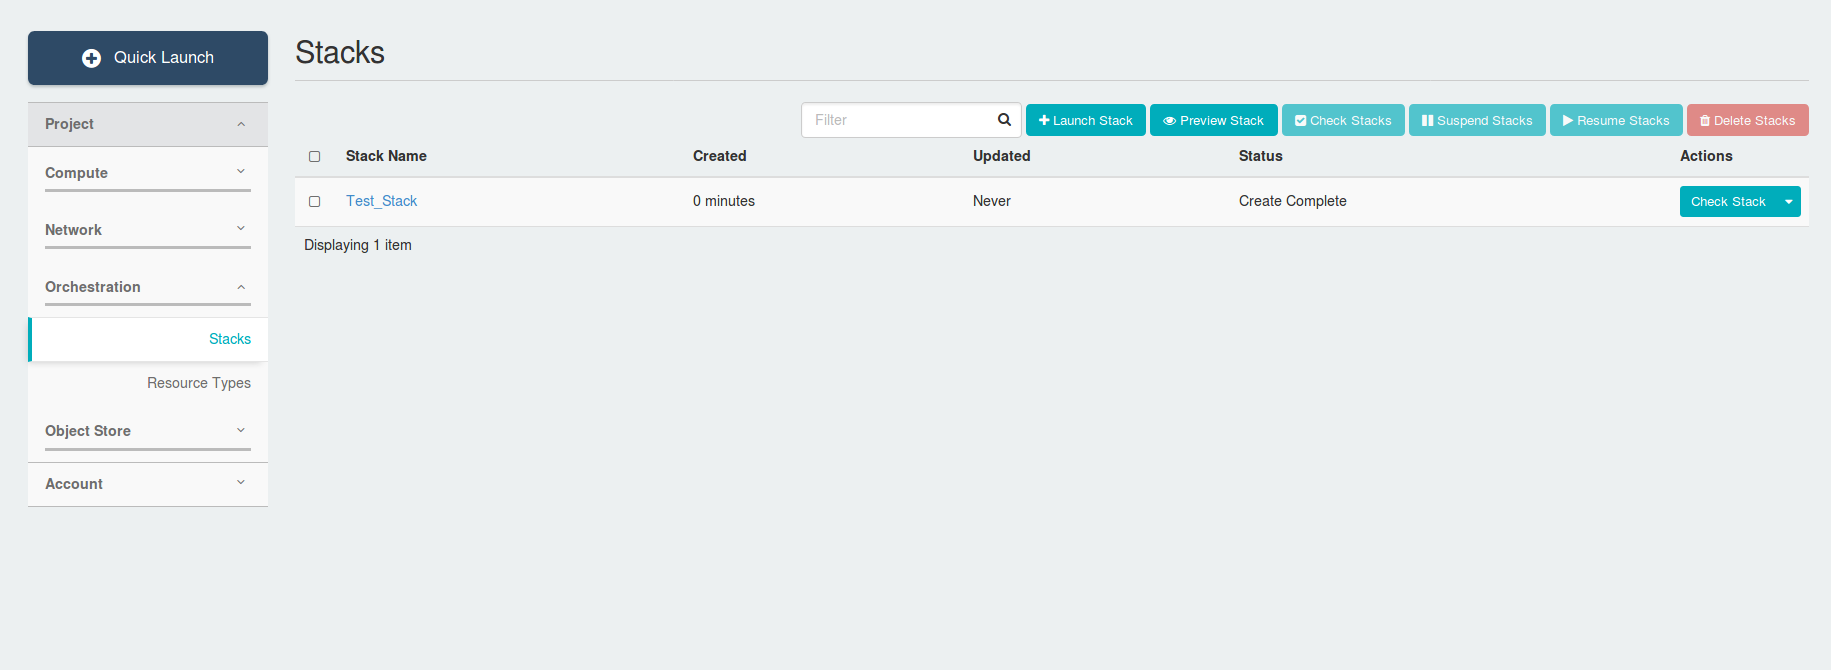
Also, you will see your instances that creating by stacks in the Instances tab.
For further reading about Heat Stack :