
How to Build a Custom Environment with Terraform on Open Stack?
This article was written to guide you to manage the OpenStack environment with Terraform. Terraform is a very powerful and capable automation tool for infrastructure management and you can use Terraform with almost any cloud service provider like AWS or GCP. In this article, Terraform installation is explained through the SkyAtlas project, which uses OpenStack in its infrastructure.
First, we start by installing Terraform. You can see how to install on Linux below, but I still recommend checking the Terraform website for the most up-to-date installation method.
$ wget https://releases.hashicorp.com/terraform/0.12.16/terraform_0.12.16_linux_amd64.zip

$ unzip terraform_0.12.16_linux_amd64.zip

$ sudo mv terraform /usr/local/bin/
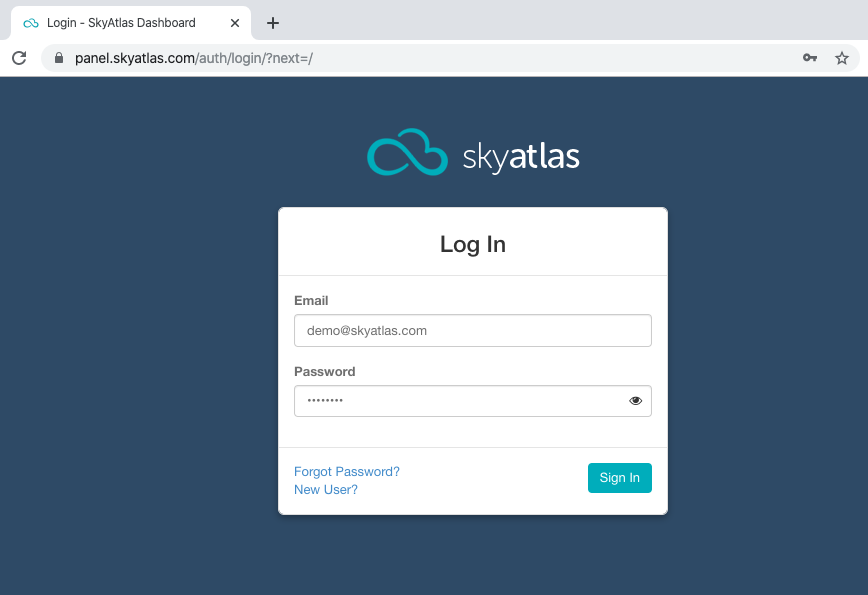
We are using an RC file for authentication. I login to SkyAtlas control panel to get this file .
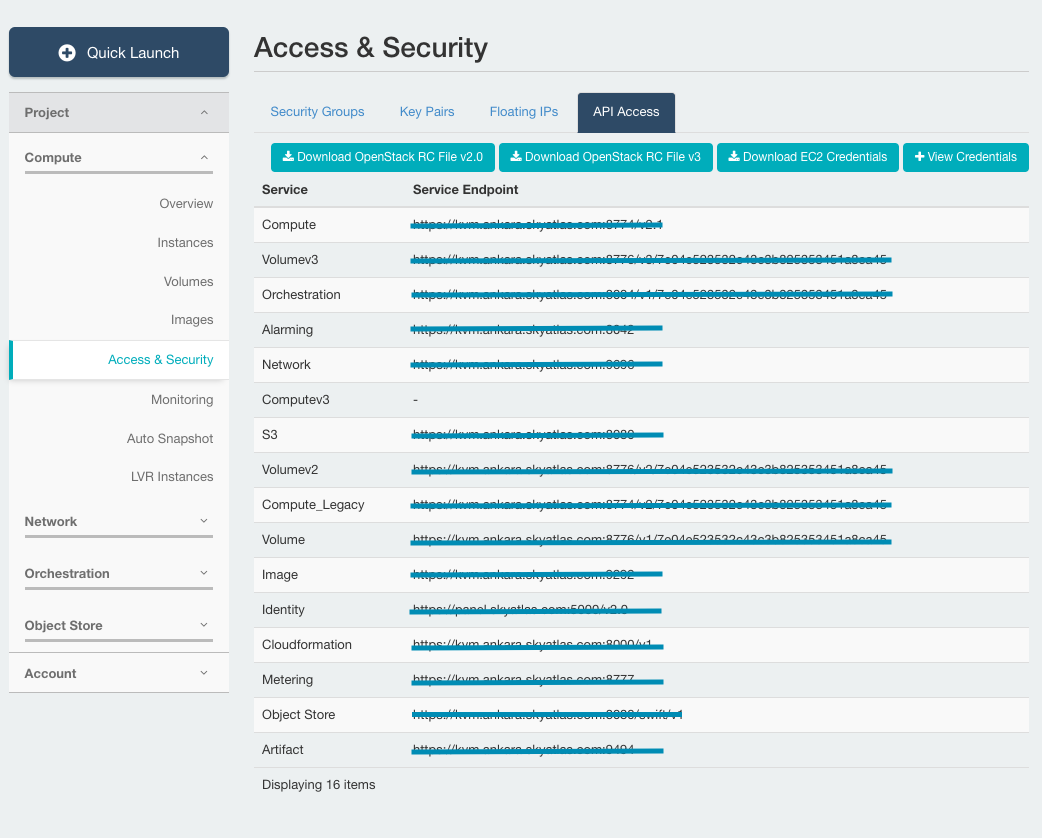
Next, we go to the Project tab in the drop-down menu, open the Compute tab, and click the Access & Security link. In the API Access tab , we click Download OpenStack RC File and save the file. (Both versions are supported by Terraform.) The filename will be PROJECT-openrc.sh; where PROJECT is the name of the project where you downloaded the file.
When you source the file , it asks for your account password. After you enter the correct password, the environment variables and your credentials for the current shell are set.
$ source THE_RC_FILE.sh Then we import the Terraform configuration files from GitLab. These files contain platform ready sample configurations where all variants are compatible with OpenStack RC file.
$ git clone https://gitlab.com/itsmeoz/skyatlas_compute_cluster.gitWhen the process is finished, we go to the folder where we want to install (deploy):
$ cd instance_with_lb
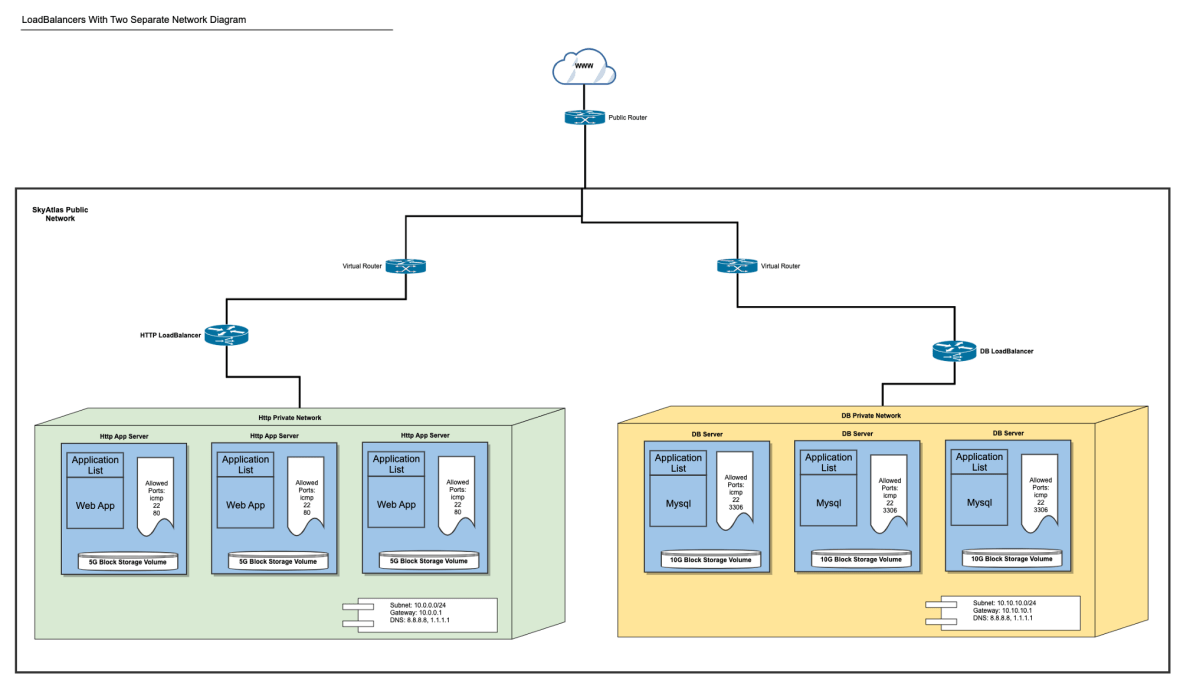
In the example below, we will set up two load balancers, two separate networks, and two different virtual server (instance) groups connected to these networks:
Terraform needs to download provider plugins first.
$ terraform initIt would be nice if we had a plan before we started the deployment, right? The Terraform plan command creates an execution plan that will provide output for the actions to be performed.
Just copy and paste the command below, it will work with your rc file if you already source it.
$ terraform apply \

-var os_username=$OS_USERNAME \

-var os_project_name=$OS_PROJECT_NAME \

-var os_password_input=$OS_PASSWORD_INPUT \

-var os_auth_url=$OS_AUTH_URL \

-var os_region_name=$OS_REGION_NAME \

-var ssh_key_file=~/.ssh/id_rsa
Note: The above command assumes you have an ssh-key file under your home directory ' ~/.ssh/id_rsa' . If it doesn't exist or you want to use a different key file, you need to change the path.
If you are satisfied with the Terraform plan output, you are ready to set up your environment.
$ terraform destroy \

-var os_username=$OS_USERNAME \

-var os_project_name=$OS_PROJECT_NAME \

-var os_password_input=$OS_PASSWORD_INPUT \

-var os_auth_url=$OS_AUTH_URL \

-var os_region_name=$OS_REGION_NAME \

-var ssh_key_file=~/.ssh/id_rsa
Warning: Terraform destroy command will not destroy the block storage volumes of your virtual servers for security reasons; Note that you can modify the code or manually delete these block storages if you don't need them.