Cyrberduck for Skyatlas Object Storage (Windows & OS X)
Cyberduck is a free file management tool that enables cloud storage on Openstack Swift (object storage).
Supported Operating Systems:
Windows XP and above,
OS X 10.7 and above.
System requirements:
OS X x64 Intel platform
Setup
In order to access the Cyberduck application, an Openstack cloud account must be obtained and an object storage container must be created. When a user account is created via Skyatlas, access to object sotrage can be provided through the application with the same account.
If you do not have an account, click here
to create a Skyatlas user account .
If youhave an account, click here
Note: It must be marked as Public when creating the Object storage container.
You can access the installation file of the application via the following URL.
For Windows,
https://update.cyberduck.io/windows/Cyberduck-Installer-4.7.3.exe
For OS X,
https://update.cyberduck.io/Cyberduck-4.7.3.zip
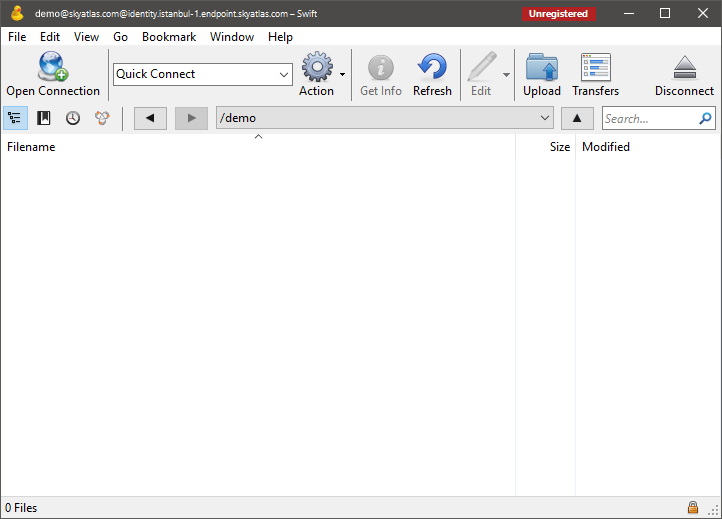
The installation file of the free version is installed on the compatible operating system and the steps in the screenshots below are applied for Skyatlas object storage access.
After the installation, the application opens and the screen where the connection information can be entered is opened by choosing Open Connection from the File menu. Swift (OpenStack Object Storage) is selected from the list on the page that opens.
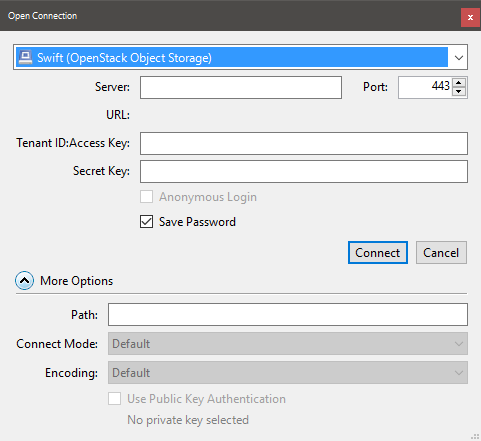
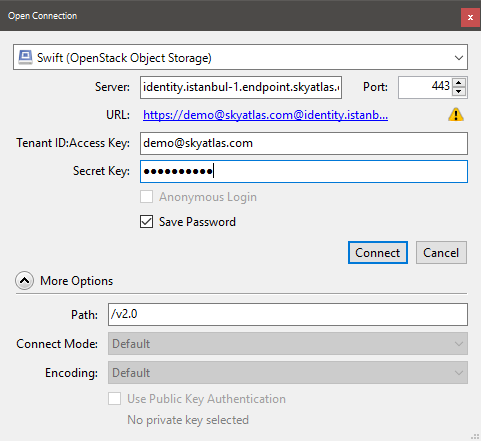
On this screen, connection information is entered in the fields, respectively, as follows.
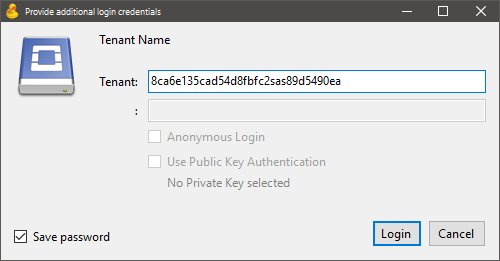
- Without URL /v2.0 in the Identity line on the https://panel.skyatlas.com/project/access_and_security/ page in the Server Name field , - Skyatlas username in the Tenant ID: Access Key field, - Skyatlas user in the Secret Key field password, -More Option section is opened and /v2.0 is written in the Path field and the connection is opened with the Connect button. -Tenant Name field on the pop-up screen that opens afterwards.Enter the part after the AUTH_ prefix of the URL in the Object Storage line listed on the https://panel.skyatlas.com/project/access_and_security/ page and connect with the Login button.
After the connection is established, you will see the screenshot below.
After this point, the folders and files in the container created on the object storage can be viewed and operations such as uploading and deleting files can be performed.The URL required to share the uploaded files can be obtained by right-clicking on the file and selecting the Copy URL option. ( URL becomes inaccessible when Object storage container is not public )
